Working on your notebook from Visual Studio Code#
Visual Studio Code, or VS Code, is a very popular IDE. In this tutorial we will see how to use VS code to connect to your CLIMB Jupyter Notebook.
This tutorial shows you how you can configure your CLIMB BIG DATA notebook to accept a connection from your local installation of Visual Studio Code. In this way you will be able to use the code editor, the terminal, and the drag-n-drop file bar of Visual Studio Code instead of the - great but limited - web interface.
This is a tutorial for advanced users aiming at integrating their workflow with their CLIMB BIG DATA notebook.
Prerequisites
We will assume you are a VS Code user already and you can install extensions and that you have a GitHub account. If you are not, you might be interested in learning why it's so popular, and maybe download it and give it ago.
Install "Tunnels"#
Further
The enabling technology of this tutorial is described in the Developing with Remote Tunnels page of Visual Studio Code documentation. Note that the section How can I ensure I keep my tunnel running? will not work on notebooks.
Inside your local VS Code, install the extension Remote - Tunnels by Microsoft.
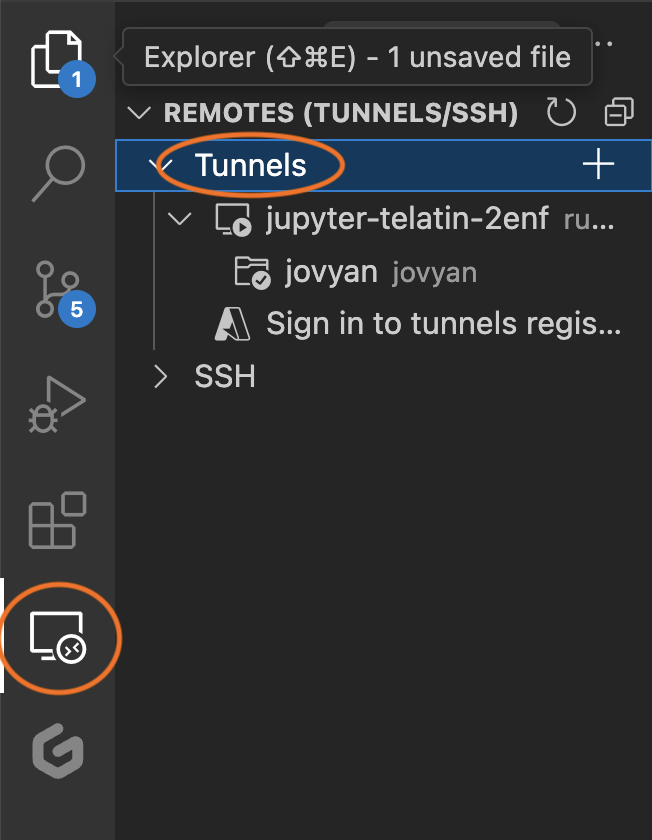
After you install it, go to your Remotes tab and login using your GitHub account (you should see a Sign in using your GitHub account item in the menu).
See the image below to locate the "Remotes" tab.
Install VS Code in your CLIMB terminal#
First, you will need to download VS Code also in your CLIMB notebook. This step has only to be done the first time.
# SETUP (this has to be done once)
cd $HOME
# Download VS Code (this has to be done once)
wget -O code.tgz "https://code.visualstudio.com/sha/download?build=stable&os=cli-alpine-x64"
# Expand the package (this has to be done once)
tar xvfz code.tgz
Now, you can run a tunnel from your CLIMB terminal, with this command:
~/code tunnel
This command will start an interactive configuration walk-through so keep an eye at the terminal and answer the questions / follow the instructions.
You will have to follow the instructions which will involve:
- Selecting GitHub as provider
- Following the provided link and pasting there the code that will appear on your CLIMB notebook
- Authorize the connection
- Return to your CLIMB notebook terminal, and give a name to the connection
Here a typical example of the connection setup:
*
* Visual Studio Code Server
*
* By using the software, you agree to
* the Visual Studio Code Server License Terms (https://aka.ms/vscode-server-license) and
* the Microsoft Privacy Statement (https://privacy.microsoft.com/en-US/privacystatement).
*
✔ How would you like to log in to Visual Studio Code?
· Github Account

To grant access to the server, please log into https://github.com/login/device and use code 420D-0000

✔ What would you like to call this machine? · jupyter-telatin-2enf
[2024-03-18 12:25:40] info Creating tunnel with the name: jupyter-telatin-2enf

Open this link in your browser https://vscode.dev/tunnel/jupyter-telatin-2enxf
When you are done, you can either click on the link provided on your terminal, or refresh
your tunnels list in your local VS Code, and as shown in the image above, you should see the
jupyter-groupname-id (or custom name you gave)
What you can do now#
- Your Visual Studio Code terminal will now display your CLIMB terminal: you will find the paths and the conda environments of your notebook, and the executions will happen on your notebook.
- Your file navigation will show you your CLIMB files, and you will be able to download and upload files to your notebook dragging and dropping files from the left sidebar
- Most notably, your code editor will be Visual Studio Code, you will have the syntax highlighting, multi-edit, plug-ins and other features of Visual Studio Code to edit and visualise your CLIMB BIG DATA files.